

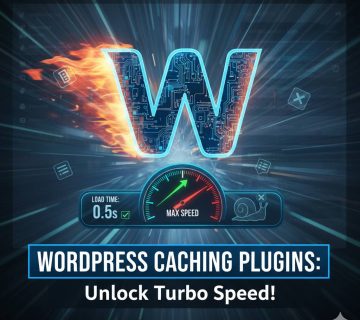
Is your WordPress website slow to load? Are you looking to improve
LiteSpeed Cache is one of the most effective caching plugins on the market, especially when your hosting uses the LiteSpeed web server. When properly configured, it can significantly reduce load times, resulting in a better user experience and improved visibility for Google.
Why use LiteSpeed Cache in WordPress?
Before we begin, it’s important to understand why this plugin is highly recommended:
-
Native LiteSpeed support: Take full advantage of your server’s capabilities.
-
All-in-one optimization: Includes page caching, image optimization (WebP), CSS/JS minification, and CDN.
-
Direct impact on Core Web Vitals: Improves key metrics such as LCP, FID, and CLS.
-
It’s free: The basic version offers more than enough functionality for most sites.
Prerequisites for using LiteSpeed Cache
Not all hosting providers can support this plugin. For it to work, you’ll need:
-
Un hosting con servidor LiteSpeed (LSWS, OpenLiteSpeed).
-
An updated WordPress installation.
⚠️ Important: If your hosting uses Apache or Nginx, the plugin won’t run at full capacity, although some optimization options will still be available.
Step 1: Install the LiteSpeed Cache Plugin
The installation process is identical to any other plugin.
-
Access your WordPress Dashboard.
-
Go to Plugins> Add New.
-
In the search engine, type “LiteSpeed Cache”.
-
Click “Install” and then “Activate.”

Step 2: Basic and Essential LiteSpeed Cache Configuration
Once activated, you’ll see a new item in the side menu called LiteSpeed Cache. The configuration is extensive, but we’ll focus on the essentials for a fast and secure setup.
1. General Settings (Tab [1] Cache”)
Go to LiteSpeed Cache > Cache.
-
Enable cache: Turn ON the option to turn on the main cache.
-
Tab [2] TTL (Time To Live): For a standard blog, a TTL of 4 hours (14400 seconds) is a good starting point.

2. Optimize CSS, JS and HTML
This is one of the most powerful sections. Go to LiteSpeed Cache > LiteSpeed Cache Page Optimization.
-
CSS Settings Tab:
-
✅ CSS Minify
-
✅ CSS Combine
-
✅ Generate Critical CSS (Very important for Core Web Vitals)
-
-
JS Settings Tab:
-
✅ JS Minify
-
⚠️ JS Combine (Activate it, but if you see errors, deactivate it)
-
✅ Defer JS (Or use “Delay JS” for better performance)
-
-
HTML Settings Tab:
-
✅ HTML Minify
-
🔧 Pro Tip: Activate one option at a time and make sure your site doesn’t break. Combining JS can cause conflicts with some themes or plugins.

3. Image Optimization (LiteSpeed Cache > LiteSpeed Cache Image Optimization)
LiteSpeed can convert and serve your images in WebP format, a modern format that reduces weight without losing quality.
-
Image Optimization Settings > Turn on Next Generation Image Format > WebP.
-
Image Optimization Overview: Click Submit Optimization Request to have the plugin process all your images and create WebP versions.
4. Cache Settings for Mobile and Logged-In Users
-
Mobile Cache: Under Cache > Mobile, enable this option if you have a responsive theme. It’s recommended.
-
Cache for Logged-in Users: Under Cache > Logged-in Users, this is usually disabled to avoid problems with shopping carts or custom content.
Step 3: Purge and Final Test
After saving all changes, it is crucial to purge the cache.
-
Go to LiteSpeed Cache > Toolbox > Purge.
-
Click Purge All.
-
Open your website in an incognito window and check its speed with tools like GTmetrix or PageSpeed Insights.
You will see a significant improvement in your performance score.
Common Errors and Solutions
-
The website looks broken: Disable CSS and JS merging. Check the “Critical CSS” section.
-
Cache not updating: Make sure to clear the cache after making changes and check the TTL settings.
-
WebP images are not being created: Check that the WordPress cron job is working correctly.
Conclusion
Properly configuring LiteSpeed Cache is one of the best investments you can make for your WordPress site. With this guide, you’ve learned how to activate key options that improve speed, SEO, and user experience without needing to be an expert.
Do you have questions about a specific configuration? Leave us a comment and we’ll help you!


No comment